A Detailed Guide to Home Winemaking
A Detailed Guide to Home Winemaking
Yes it is legal to make wine, mead and hard cider in the United States (U.S). Under federal law any adult may, without payment of tax, produce wine for personal or family use and not for sale. The aggregate amount of wine that may be produced exempt from tax with respect to any household may not exceed:
- 200 gallons per calendar year for a household in which two or more adults reside, or
- 100 gallons per calendar year if there is only one adult residing in the household.
You may view the law here.
Many people, particularly those with access to fresh fruits from local farms or their own property, are diving into the home winemaking hobby. Winemaking is both challenging and rewarding, especially for enthusiasts of canning, baking, and gardening. It's an activity best enjoyed with friends and family, where extra hands can make the process even more delightful. However, creating good quality wine at home goes beyond just following a simple online recipe that might suggest pouring a juice and sugar mixture into a milk jug and capping it with a balloon. Please, for the love of winemaking, do not do that! Winemaking is both an art and a science, demanding meticulous attention to detail. So, grab a notebook and prepare to immerse yourself in the expansive world of winemaking.
This article is crafted to offer comprehensive instructions for successfully making wine at home. It's tailored for beginners who are unsure where to start, as well as for amateurs struggling with their current methods. This piece serves as an update to outdated winemaking practices, featuring detailed explanations of the equipment, tools, and ingredients that are readily available to a 21st century home winemaker.
Equipment Required for Home Winemaking
The equipment required for making wine depends a great deal upon the quantity to be processed during a given period of time. On the average, the home winemaker will produce one to six gallons at a time. This is a list of equipment that every beginning winemaker should have at home.
(*) Items are included in the Crafted Bottler Mead, Cider & Wine Making Equipment Kit.
- Primary Fermenter with lid*: A food grade plastic vessel and with a small hole and grommet in the lid with approximately 2 gallons of capacity more than you plan to make. This will allow fermentation bubbling and foaming to happen without spilling over. Food grade containers are best to use because they are easy to clean and do not affect the taste of the wine.
- Carboy or Secondary fermenter: A glass or plastic narrow-necked container with an opening only large enough for a stopper and airlock. Used for clarifying and aging beverages. They are available in 1, 3, 5, or 6 gallon sizes. Fermenting wine is transferred to these containers 7-14 days after the start of fermentation once primary fermentation has slowed down.
- Air Lock*: Designed to prevent bacteria and oxygen from getting into your wine, while allowing the produced carbon dioxide gas to escape. Fill with sanitizer to keep oxygen out. Air contact can spoil wine through oxidation or can contaminate the wine with acetic bacteria. These bacteria convert the alcohol in the wine to vinegar.
- Drilled Stopper: Use either a gum rubber or PET style. A stopper is necessary to hold the air lock in place on the carboy.
- Auto Siphon with Tubing*: Used to transfer wine from one container to another while leaving sediment behind. It is also used with a bottle filler or bottling wand for consistent mess free bottling.
- Mixing Paddle*: A winemaking specific food grade plastic stirring utensil long enough to reach the bottom of the primary fermenter. Its narrow end fits in secondary carboys with narrow necks; essential for mixing fruit and sugar and for stirring during primary and secondary fermentation.
- Mix Stir Degassing Tool*: Attaches to a power drill and is used to remove the carbon dioxide gas from wine or introduce oxygen into must before yeast is added. An optional tool, but strongly recommended.
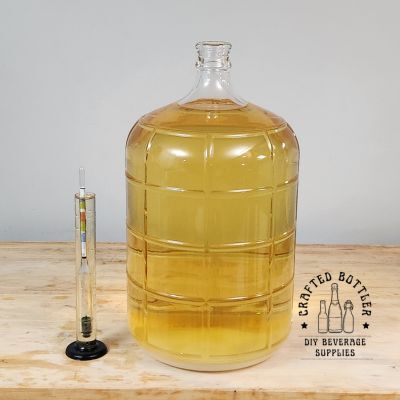
- Hydrometer*: A simple, inexpensive tool for measuring sugar content using the Specific Gravity (S.G.) scale to monitor fermentation progress. Crucial for determining accurate alcohol content.
- Thermometers - stick on and probe*: Used to monitor the temperature during the winemaking process.
- Wine Thief*: For taking samples from the primary fermenter and secondary carboy for testing and tasting.
- Test Jar*: a 10-inch to 14-inch tall cylinder to put wine in for testing with a hydrometer. Use a wine thief to collect a sample to fill the test jar.
- Bottle Filler*: Attaches to the bottom of the siphon tubing and automatically dispenses liquid when pressed into the bottom of a bottle. Stops flow upon removal from the bottle, allowing you go to between bottles without spills.
- Corker*: Inserts corks into bottles. Several styles exist; a floor corker is best, although a hand corker is included in starter equipment kits.
- Corks*: Use new corks for each batch to ensure a proper seal. Do not soak corks! In the 21st century, this practice only expands corks, making insertion difficult. A quick dip in sanitizer is sufficient to kill bacteria. After corking, store bottles upright for one week to equilibrate pressure, then lay them on their side to keep corks moist, storing at 60° F.
- Bottles: 24 - 750mL bottles will be needed for every 5 gallons. Standard wine bottles with a cork finish are recommended for wines aging over two months. Avoid screw-top bottles for home winemaking due to the specialized equipment needed to seal them properly, which isn't available to home winemakers. Bottles come in various colors however, green and clear are the most popular. Cork finish bottles can be reused; rinse with hot water, clean with Easy Clean or One Step, and sanitize with a quick rinse of sodium or potassium metabisulfite. All cork finish bottles have a uniform opening, fitting #7, #8, or #9 corks. For more on choosing corks, visit our blog: Crafted Bottler Corks.
(*) Items are included in the Crafted Bottler Mead, Cider & Wine Making Equipment Kit.
Common Ingredients Required for Home Winemaking
Choose your Winemaking Fruit Base: Wine Kit, Juices - either fresh or concentrated, or Fresh Fruits
- Wine Kits: Make home winemaking simple, affordable, and fun! They are the perfect way for a beginning winemaker to enter into winemaking. Each kit comes with pre-measured ingredients, including concentrated grape juice and yeast, plus easy-to-follow instructions. Fermentation of wine kits takes only 4-8 weeks, resulting in delicious, high-quality wine that rivals your favorite store-bought brands—all with minimal equipment and effort. Whether you're making it solo or sharing the experience with friends, wine kits are a guaranteed way to create something special and memorable.
- Fresh Grape Juices: In most areas of the US, fresh grape juices are available twice a year: spring juices from South American grapes, and fall juices from California, Italian and grapes that are local to the growing area. Check with your local wineries to find out when these juices are available in your area. Many wineries require pre-orders for juices because they are pressed from freshly harvested grapes. Grape harvest times determine availability, so stay in touch with your winery. Fresh grape juices are as close as you can get to making wine from fresh grapes, removing the need for crushing and pressing while still producing phenomenal wines. Making wine from juice is similar to using a wine kit but requires closer monitoring.
- Concentrated Bases and Juices You can make mead or fruit-based country wines using bottled juice, concentrated bases, or frozen juices. For a convenient start, pair your own apple juice with a Cider Ingredient Kit or try a Mead Ingredient Kit with local honey, both of which include everything you need to craft delicious beverages. Be sure any juices you buy do not contain potassium sorbate, as it will prevent fermentation.
- Fresh Fruits: Making wine from fresh fruit is the most involved method of home winemaking. It requires significant equipment investment and sourcing large amounts of fruit—around 3-7 pounds per gallon of wine. To put that in perspective, you'll need about 85 to 90 pounds (39 to 41 kg) of fresh grapes (still on their stems) to make five gallons of wine. While this method allows for more creativity, it's expensive and increases the chance of mistakes, which can be discouraging for beginners. The maturity and condition of the fruit used for fermentation are crucial. Green fruit is typically high in acid and low in sugar, giving wine tartness but lacking true fruity flavor. Fully ripe fruit has the lowest acid and highest sugar content, ideal for winemaking to impart a pleasant fruit flavor. Overripe or bruised fruit, even if visibly fine, can lead to mold and decay, resulting in disagreeable flavors.
Water for Winemaking
Can I use tap water to make wine?
Yes, if it's safe and tastes good. Spring water is often recommended for its mineral content that is beneficial for fermentation. If using tap water do one of the following:
- Boil it to remove chlorine.
- Let it sit overnight to evaporate chlorine.
- Use potassium metabisulfite or Campden tablets to dissipate chlorine.
- Employ a filter system to remove chloramine and other impurities.
Avoid distilled water due to its lack of minerals and oxygen.
Flavor and taste of the finished wine is largely determined by the type of yeast used in fermentation. For best results, only use wine yeast. There are many strains available from brands such as Lalvin, Red Star and Mangrove Jacks. It is best to avoid using Baker’s yeast; it is also more expensive than wine yeast. Visit this blog for more detailed descriptions of wine yeasts.
Yeasts are living organisms and as such require a balanced diet for proper development. Most fruits used for winemaking are lacking part of the yeast nutrient requirements, even wine grapes. A balanced yeast food known as nutrient must be added with the yeast at the start of fermentation. Yeast nutrient feeds the yeast ensuring that it remains healthy throughout fermentation. Nitrogen is often lacking during the fermentation process and having sufficient nitrogen allows wine yeast to reproduce more readily. Today there are many types of yeast nutrients available for home winemakers. Some of the best and easily available are:
- Yeast Nutrient by LD Carlson is a basic nutrient suitable for most winemaking. It is a mixture of diammonium phosphate (DAP) and food-grade urea.
- Fermaid K™ is a complex formula that provides a complex formula including DAP, amino acids, and various vitamins and minerals. Fermaid K allows yeast to implement important survival factors needed to maintain alcohol resistance. It also helps keep volatile acidity levels low.
- Fermaid O™ is a newer nutrient available to home winemakers its formula is an organic source of nitrogen. Fermaid O fermentations show fewer temperature spikes, which minimizes negative effects that can be caused by heat resulting in a more consistent and complete fermentation with fewer off-flavors.
- Opti-Red™ with Lallzyme EX™ is a nutrient blend that that improves body, color stability, and mouthfeel in red wines. Use with Lallzyme EX for best results.
- Opti-White™ is derived from natural, inactivated yeast. It increases mouthfeel, avoids browning, and protects fresh aromas during aging in white wine.
- Raisins can be used as a substitute for nutrients; wines will require a ½ cup to 1 cup of minced raisins per gallon of crushed fruit. Raisins used in winemaking should be organic and not contain any oils.
What’s the difference between Campden tablets, sodium metabisulfite or potassium metabisulfite?
The first thing to understand is that all three of these wine making ingredients do the same thing, add sulfites to kill off harmful bacteria and wild yeasts that might be present in winemaking juice and fruit. Adding sulfites to your juice before fermentation creates a clean environment for your desired wine yeast to ferment. Post-fermentation, sulfites act as an antioxidant to protect the wines flavor and color from oxygen.
It is recommended to only use potassium metabisulfite in wines after fermentation has begun because sodium metabisulfite adds sodium to wine. The recommended dose of potassium metabisulfite to homemade wines prior to bottling is ¼ teaspoon of potassium metabisulfite for 5-6 gallons to help preserve the wine’s flavor, color and shelf life.
Sodium metabisulfite leaves sodium in wine, while potassium metabisulfite leaves potassium. Therefore, sodium metabisulfite is mainly for sanitizing equipment, whereas potassium metabisulfite preserves wine. Remember, Sodium starts with "S" for Sanitize, Potassium with "P" for Preserve.
Now that we have cleared those up, what makes Campden tablets different from potassium and sodium metabisulfite? Campden tablets are simply potassium metabisulfite or sodium metabisulfite in tablet form. The tablets are measured in a dose for one gallon of wine. They are a matter of convenience. One Campden tablet is equal to 1/16 teaspoon of metabisulfite.
Winemaking Acids (pH)
Understanding acidity's role in winemaking is crucial. Juices and fresh fruits vary in acid content, affected by yearly growing conditions. Cooler climates lead to higher acidity, while warmer climates result in lower acidity. Always test acidity even if you're buying from the same source annually. Grapes can have high tartaric acid levels, which vary year to year. Fruits like apples and pears are often low in acidity, requiring additions like acid blend or malic acid.
Lack of acid can make a dull wine while too much acid makes it sharp. Acidity (pH) may also affect fermentation and should be monitored using a wine acid test kit. Corrections can be made using a variety of pH adjusters that lower pH/raise acidity or raise pH/lower acidity. To lower ph and raise acidity use one of the primary acids in winemaking. They are citric, malic, and tartaric acid, with acid blend being a common mixture of all 3. Raising pH/lowering acidity is more difficult and should only be added cautiously after testing using potassium bicarbonate or calcium carbonate.
Acidity ensures the wine’s longevity, character, and drinkability. The ultimate goal is to achieve a balance of acidity, tannins, alcohol, and sweetness. Managing acidity blends science and art, defining a wine's character and flavor profile. It's crucial for crafting wines with depth and complexity.
Tannins, along with acidity, add structure and complexity to wine. They give wine its "bite" or astringency. Red grapes usually have sufficient tannin, but white grapes and other fruits might need added tannin for proper astringency. Powdered tannin is available to home winemakers; follow package instructions for use. There are varieties for different wines, including white, red, and fruit wines. Tannin is a “to taste” additive and can be used during and after fermentation.
Sugar for Winemaking
The three main types of sugar used in home winemaking are:
- Fructose (fruit sugar): The natural sugar from the fruit being used to make wine whether in juice, concentrated or solid form.
- Dextrose (corn sugar): The preferred sugar to increase alcohol levels in wine.
- Sucrose (table sugar): Either cane or beet is less ideal for winemaking due to flavor issues when used in large amounts.
- Brown sugar is a mixture of sucrose and molasses, it can add balance to some wines like apple, but limit it to 1-2 pounds per 5-6 gallon batch.
The amount of sugar used in winemaking controls the alcohol content and if used in large amounts; it may not fully ferment creating a sweet wine that may or may not be desired by the winemaker. Overuse of dextrose over fructose will thin a wine’s body and result in a “hot” alcoholic flavor. Counterbalance dextrose additions over 3 pounds in a 5-gallon batch with white grape concentrate or red grape concentrate to keep the body of the wine.
Add carefully: One pound of corn sugar raises the potential ABV of 5 gallons by 1%. Use a hydrometer to ensure the correct sugar balance for delicious wine.
Use Honey in Place of Sugar: For experimentation, substitute honey for sugar in recipes. Keep in mind that honey's herbal qualities are not suitable for all wines. Use 1¼ pounds of honey in place of every pound of sugar.
Achieving clear wines starts with careful choices during primary fermentation as well as 1-2 weeks before bottling. Most wines are able to clear on their own over time however, many winemakers choose to use the following clarifiers to quickly clarify and improve the final result.
Pectic Enzyme: Pectic enzyme isn’t classified as a fining agent, but it can significantly improve fining and filtering by breaking down pectin. Pectin is natural in fruits and is often a cause of cloudiness. Pectic enzyme should be used when making wines with high-pectin fruits like apples, peaches, and berries. Follow the package instructions for proper dosage. Keep in mind that even with pectic enzyme you’ll still likely need a final fining agent before bottling to ensure complete clarity.
Bentonite is a super-absorbent clay derived from volcanic ash. It works as a negatively charged clearing agent that when added pre-fermentation, it will absorb particles during fermentation and force them to fall to the bottom. Bentonite requires the turbulence of fermentation to work properly. Bentonite is best added before primary fermentation and is particularly helpful in clearing white wines. Use caution in red wines as bentonite may strip the color and possibly flavor.
Sparkolloid is a proprietary fining agent derived from alginic acid salt found in brown algae. It’s highly effective in settling fine suspended particles and also improves filter efficiency by compacting the sediment more thoroughly. Always follow the package instructions for proper dosage. Sparkolloid is prepared by adding it to boiling water and stirring it into wine. Wines cleared with Sparkolloid can typically be bottled within 1 week.
Isinglass is a very pure gelatin made from the air bladders of sturgeon. It’s especially popular among home winemakers for clarifying white wines, as it doesn’t strip color as much as other protein-based fining agents like gelatin or casein (which are no longer recommended for clearing wines). Isinglass is added straight from the package. Follow the directions for proper dosage. Wines cleared with isinglass will also benefit from mechanical filtration.
Chitosan & Kieselsol these two fining agents are sold and used together; forming a powerful combination. Chitosan is a positively charged fining made from chitin, found in the exoskeletons of crustaceans like shrimp and lobsters. Kieselsol is a negatively charged fining made from silicon dioxide (found in quartz). When used together (as in products like DualFine or Super-Kleer), their opposite charges attract and collect suspended particles in the wine, quickly clearing it. To use, add Kieselsol first, stirring it gently into the wine after fermentation. Wait 24 hours, then add Chitosan and stir again.
While their origins might sound unusual, rest assured these clarifiers remove haze-causing particles and settle to the bottom of the fermenter. When you rack or transfer your wine, they stay behind with the lees.
The Winemaking Process
Choose your winemaking style
As mentioned previously there are 3 types of winemaking that are most popular with home winemakers: Wine Kits, Juices – fresh, packaged, and concentrated, or Fresh Fruit. To keep this simple we will focus on the juice process because aside from a wine kit it is the method most often used by home winemakers. Fresh Fruit will require crushing and pressing into a juice and therefore the process after extraction of the juice from the fruit is similar to making wine from fruit juices.
Clean all winemaking equipment and bottles thoroughly before starting a batch of wine. Don’t use soap or detergents as their residues can impart an off-taste to the wine. Easy Clean and One Step are popular products for cleaning winemaking equipment. A long-handled carboy brush is handy to clean secondary fermenters. A bottle brush will make short work of cleaning used wine bottles.
Sanitizing should be completed immediately before you use your equipment. Mix a solution of 2 oz. sodium or potassium metabisulfite to 1 gallon of warm water and thoroughly rinse the equipment about to be used. Do not rinse off sanitizer. Star San is an acid based sanitizer and is equally effective should you have a sulfite allergy.
Step 1 – Test, Measure and Mix: Pour the juice into a sanitized primary fermenter.
Test & Record Check the sugar level using a hydrometer and decide if you would like to add more sugar to the juice to increase the alcohol content.
- First, the temperature of the juice should be about 75º F when the reading is taken; check your hydrometer's instructions for the proper calibration temperature.
- Fill a test jar with a sample of juice and place it on a level surface. Gently place the hydrometer in the juice and wait for it to become still.
- Read the value at the surface of the liquid (not where it climbs up the side of the instrument).
- Record this figure immediately so it won't be forgotten! Recording your Specific Gravity (S.G.) and temperature in a log will be helpful, especially if you want to duplicate your results
More detailed instructions on how to use a Hydrometer can be found here.
Optional – Add Campden Tablets: Campden is a good idea to add if the juice you are using has been fresh pressed either on a farm or by you. If you add a Campden tablet to your juice do not add yeast for 24 hours after adding it. Campden needs time to kill the wild yeast and bacteria. It will also dissipate from your juice over this time so your desired yeast strain will be able to work properly.
Optional - Add Nutrient and/or Pectic Enzyme: Decide if you would like to add yeast nutrients to aid your yeast through primary fermentation. Pectic enzyme should be added to fruit with a high pectin level such as apples, peaches, and berries. Add the recommended amount on the package to your juice and stir.
Optional - Add Bentonite to aid in clearing.
Bentonite Instructions:
- DO NOT DUMP dry Bentonite into the juice, it will instantly turn into a clump of mud and go straight to the bottom.
- It MUST BE HYDRATED: Mix 3 teaspoons in 1 cup HOT water, and whip it into a slurry — preferably with a blender — then stir it into the juice.
Step 2 - Pitch Yeast:
Today’s home winemaking yeasts do not require rehydration, even though the back of the package may tell you to do so. It is perfectly acceptable to sprinkle the yeast over the juice and gently stir it in. If you would like to rehydrate it follow the directions on the package.
Step 3 – Primary Fermentation:
Snap the lid on the fermenter, fill the airlock with sanitizer and move the bucket to an area that is between 68°- 72° F. Most wine yeasts happily ferment at this temperature, however with so many wine yeast strains available to home winemakers today do check the instructions on the yeast sachet.
Fermentation is greatly affected by temperature. A brewing belt can be attached to the bucket to help control the temperature if your home is too cold.
Step 4 - Stir:
For the first 2-3 days gently stir the wine for 3- 5 minutes
- Ensure you sanitized the spoon or paddle
- Avoid placing the lid on any unsanitary surface.
Continue to monitor the yeast activity (bubbling, foaming, etc.) that is most active in this stage. The Specific Gravity (S.G.) readings will decrease as sugar converts to alcohol.
Step 5 – Transferring “Racking” the Wine:
During the process of fermentation, fine sediment (lees), comprised mainly of dead yeast cells, will fall to the bottom of the fermenter. Racking separates the wine from this sediment:
- Place the primary fermenter on a counter and place a short stable table approximately 18-24-inches below the counter.
- Place the secondary fermenter on the table. The secondary can also be placed on the floor just be sure your siphon tubing will reach from the top of the primary on the counter to the secondary on the floor.
- Use an auto siphon (also called an easy siphon) to transfer the wine from the primary into the secondary taking care not to stir up the lees.
During this first racking:
- Allow slight aeration by letting the wine fall from the middle to the bottom of the secondary container. This oxygen helps remaining yeasts complete fermentation and produces CO2 that fills the airspace and protects the wine from oxygen.
- If desired, add one-eighth-teaspoon potassium metabisulfite or one Campden tablet for every three gallons of siphoned wine to prevent spoilage.
Important to note: If the wine does not fill the secondary to within 2-3 inches of the stopper, consider these options:
- Top up with water, which might decrease alcohol and affect flavor.
- Top up with a similar wine, the best option if you can find a match.
- Add sanitized glass marbles to displace volume, though this is messy as more sediment will settle into the marbles over time. Ensure marbles are food-grade.
Fit the secondary with a stopper and airlock, and then wait a month before the next racking to allow fermentation to complete. Some wines might ferment slowly for several months and remain cloudy, requiring multiple rackings (three or four times) before they are clear enough for bottling. Each racking should be done with minimal aeration, that is, the siphoning hose should be submerged below the liquid in the lower container to keep air out of the wine.
Step 6 – Clarifying the Wine:
The chilling (30-40° F) of grape wine, post-racking promotes a natural clarification. Unwanted matter and suspended solids are precipitated as crystals in the bottom of the container.
All other wines can be treated with one of the above mentioned clarifiers if they don't clear naturally to your satisfaction.
Step 7 – Bottling the Wine:
Once fermentation has completely stopped, and the wine is sparkling clear, it's ready for bottling. DO NOT BOTTLE CLOUDY WINE!
Before bottling retest the Specific Gravity with a hydrometer to determine the final alcohol content of the wine. More information can be found at this article: How to Use a Hydrometer
To preserve color, flavor, and prevent spoilage or bottle explosions from re-fermentation; add potassium metabisulfite or a Campden tablet (one-eighth teaspoon or 1 tablet per three gallons) before bottling.
Use the siphon setup with a bottling wand to transfer wine into bottles without aerating. More detailed instructions on using a bottling wand can be found here: Mastering the Bottling Wand
An inexpensive hand corker can be used, but other options like a double-lever hand corker or floor corker exist. Avoid screw-tops or plastic tops for homemade wines.
Finally, dress up your bottles like a professional winemaker, whether for personal satisfaction or for gifting, by adding a personal touch. Start with a homemade label that not only identifies the contents but also tells a story or reflects your creativity. Choose a design that complements the character of your wine, mead or cider, perhaps echoing the vintage or the unique blend of flavors. Then, elevate the presentation further with a matching bottle topper - be it a cork adorned with a wax seal, or a decorative cap that adds an element of elegance or whimsy. This attention to detail ensures your handcrafted beverages receive the love and respect they deserve, turning each bottle into a cherished piece of art that celebrates the artisanal process behind your winemaking.
Step 8 – Storing the Wine:
Wines age best at an even temperature around 60° F-65°. A clean, dry basement, shielded from light, is ideal for storage. Avoid any areas with vibration like near a washing machine or furnace. Store bottles upright for one week, then on their side to keep corks moist and prevent spoilage bacteria entry.
Notes on aging homemade wine:
- Subtle flavor changes occur during aging, enhancing each wine’s bouquet and appeal.
- Sedimentation might occur; if so, decant clear wine into a clean bottle before serving.
- Wine can be consumed any time after bottling, but aging for 3 months to 1 year before consumption improves clarity and flavor
In conclusion, the art of home winemaking not only reconnects us with traditional practices but also allows for a personal touch of creativity and experimentation. As explored in this article, the journey from fermentation to bottling is not just about the end product but about the joy of creation, the sharing of homemade treasures with friends and family, and the continuous learning that comes with each batch. Here's to the winemakers who are willing to push boundaries, one bottle at a time, and to the future where every sip tells a story!
Bibliography:
Cox, Jeff. From Vines to Wines. North Adams, MA: Storey Publishing, 1999.
Massaccesi, Raymond. Winemaker's Recipe Handbook. 1976.
University of Georgia Cooperative Extension. Winemaking at Home. Circular 717, 2013.
Fermaid O™: https://scottlab.com/fermaid-o-yeast-fermentation-nutrient-fermo
Fermaid K™: https://scottlab.com/fermaid-k-yeast-fermentation-nutrient-fermk
Opti-Red™: https://scottlab.com/opti-red-yeast-derivative-nutrient-optired
Opti-White™: https://scottlab.com/opti-white-yeast-derivative-nutrient-optiwh
Lallzyme EX™: https://scottlab.com/lallzyme-ex-enzyme-lzymex
https://www.craftedbottler.com/blogs/