
How to Make Hard Seltzer
This step-by-step guide will help you craft a crisp and refreshing hard seltzer at home. The recipe produces 5 gallons, which can be customized with your favorite flavors. Follow these instructions for a perfect batch every time!
Ingredients
- Base Ingredients:
- 5 lbs. corn sugar
- 5 gallons water
- Fermentation Additives:
- 1 packet Propper Seltzer Nutrient
- 1 packet Omega Lutra Yeast
- Clarifying Agent:
- 1 tablespoon Sparkolloid
- Flavor Options (choose one):
- 6–8 oz. Brewer’s Best Flavoring
- 4 oz. Amoretti Flavoring
- Carbonation Additives (if bottling):
- 5 oz. priming sugar (omit if using Amoretti)
Instructions
Day 1: Prepare the Hard Seltzer Base
Dissolve the Sugar
- Combine 5 lbs. corn sugar and 5 gallons of water in a large stainless steel pot.
- Stir thoroughly to dissolve the sugar.
Heat the Mixture
- Heat the solution to just below boiling, stirring occasionally. Hold the temperature for 10 minutes.
Cool the Mixture
- Remove the pot from heat and stir in 1 packet of Propper Seltzer Nutrient.
- Use a wort chiller or an ice bath to quickly cool the mixture to 85°F.
Measure Specific Gravity (SG)
- Use a hydrometer to test the SG. Aim for a reading of ~1.040, which will produce a beverage with ~5.25% alcohol. Record your reading.
Oxygenate and Ferment
- Vigorously aerate the cooled mixture by stirring (a Mix-Stir attached to a drill is perfect) for 2–3 minutes.
- Pour the solution into a sanitized 6–6.5-gallon fermenter.
- Sprinkle the yeast on top. Seal the fermenter with an airlock and store it in a location where the temperature stays between 75–90°F.
Monitor Fermentation
- Fermentation should start within 24 hours. Look for bubbling in the airlock or foam on the surface.
Day 10–14: Complete Fermentation and Clarify
Check Fermentation Progress
- After 10–14 days, measure the SG again. If it reads 1.000 or lower, fermentation is complete.
- Allow an additional few days if necessary for the yeast to “clean up” off-flavors and for sediment to settle.
Transfer the Seltzer
- Use an auto-siphon to transfer the liquid into a clean, sanitized carboy, leaving behind any sediment.
Clarify the Seltzer
- Prepare Sparkolloid: Boil 1 cup of water with 1 tablespoon of Sparkolloid for 5 minutes.
- Let the mixture cool slightly and gently stir it into the seltzer.
- Reattach the airlock and allow the seltzer to clear over the next 5 days.
Day 19: Flavor and Carbonate
Option 1: Bottling with Brewer’s Best Flavoring
Prepare Priming Sugar
- Boil 1 cup of water with 5 oz. priming sugar for 10 minutes. Let it cool.
Add Flavor and Prime
- Transfer the seltzer to a clean, sanitized bottling bucket, leaving sediment behind.
- Stir in 6–8 oz. of Brewer’s Best flavoring (adjust to taste).
- Add the priming sugar solution and mix gently.
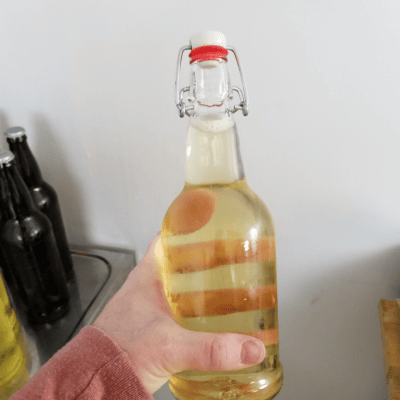
Bottle and Carbonate
- Fill sanitized bottles using a bottling wand. Cap the bottles and store them in a warm location for 1–2 weeks to carbonate.
Option 2: Bottling with Amoretti Flavoring
- Flavor and Bottle
- Transfer the seltzer to a clean, sanitized bottling bucket, leaving sediment behind.
- Add 4 oz. Amoretti flavoring (adjust to taste) and mix gently.
- Fill sanitized bottles and cap. Store for 1–2 weeks at room temperature to carbonate.
Option 3: Kegging
Transfer and Flavor
- Siphon the seltzer into a sanitized keg, leaving sediment behind.
- Add your flavoring of choice and stir gently.
Carbonate
- Chill the keg, set the pressure to 30 PSI, and allow it to carbonate for 36–48 hours.
- Reduce pressure to 8–10 PSI for serving.
Additional Tips and Notes
- Flavoring with Amoretti: Adding Amoretti flavoring during bottling may cause slight cloudiness and a color change. To avoid this, add it during fermentation when the SG reaches 1.030–1.025.
- Sweetening Your Seltzer: For sweetness, use non-fermentable sweeteners like aspartame or sucralose. Avoid sugar in bottles to prevent explosions from excessive pressure.
- Natural Style: This recipe produces a lightly flavored, unsweetened beverage similar to sparkling water. Adjust flavors to suit your taste!
Enjoy crafting and savoring your homemade hard seltzer. For recommended products and tools, check the links below.