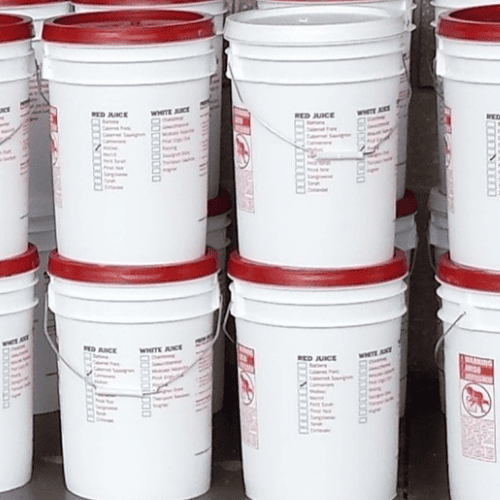
How to Make Wine from Fresh Juice

These instructions are a GENERAL guide for making wine from juice. The period in which the juice ferments solely depends on the conditions and the yeast strain’s ability to convert sugar to ethanol. This guide is not based on time; it is based on measurement of specific gravity and temperature. Specific Gravity (S.G.) indicates the density of sugar in the juice. The amount of sugar accurately shows how much is left to convert to ethanol. The most accurate way to determine when to move to the next stage is to take a S.G. reading with a hydrometer. Taking and using these readings will help ensure a successful fermentation. Learn How to Use a Hydrometer Here
Equipment: Primary fermenter (plastic bucket and lid with ventilation system), stirring spoon, hydrometer, auto-siphon with tubing, 5 gallon carboy, 1 gallon jug, 2 stoppers and 2 airlocks. A thermometer and brewing belt may be used to monitor and control temperature.
Helpful Tip: Make sure all equipment (i.e. stirring spoon, etc.) is sanitized. Contaminated equipment can ruin the quality of the juice and the finished product.
Stage 1 - Bentonite, Pitching Yeast, Stirring and Monitoring
Watch our Video on this Stage Here
Step 1 - Mixing: Carefully remove the bucket lid by removing the safety seal and pry off the lid. Let juice warm up to room temperature by either placing the bucket near a heat source or by using a brew belt.
Optional - Add Nutrient: Dilute OptiRED or OptiWHITE in 2 tablespoons water and mix. Add to the juice.
Step 2 - Bentonite: Bentonite is a negatively charged clearing agent that when added pre-fermentation, it will first settle to the bottom. But when the turbulence of fermentation begins, Co2 gas bubbles form in the wine and grab onto the Bentonite. The bubble will lift the Bentonite up to the surface, attracting positively charged solids as it rises. The bubble will burst when it reaches the surface, and the Bentonite particle will fall to the bottom again, still gathering positively charged solids as it sinks. This up and down circulation of Bentonite during fermentation clears your wine as it ferments. The self-stirring action of fermentation allows the Bentonite to collect the dead yeast and other particles as they are being produced, so that by the time you are ready to rack from the primary bucket, the Bentonite will have gathered a nice sediment of unwanted solids and dead yeast on the bottom. In addition, Bentonite helps keep wine stable during fermentation.
Bentonite Instructions: DO NOT DUMP dry Bentonite into the juice, it will instantly turn into a clump of mud and go straight to the bottom. It MUST BE HYDRATED mix 3 teaspoons in 1 cup HOT water, and whipped it into a slurry — preferably with a blender — and stir it into the juice.
Step 3 - Test & Record: Using a sanitized hydrometer and thermometer measure and record the S.G. and temperature to establish a fermentation starting point. Recording your S.G. and temperature in a log will be helpful especially if you would like to duplicate your results next season.
Step 4 - Pitch Yeast: In a large cup add 4 ounces of warm chlorine free water. This water is to not exceed 104° F. Stir the contents of the yeast packet into warm water and be sure to break up any clumps. Let the mixture stand for 15 minutes. Bubbling or increase in mixture size is a good sign of rehydration. Add an equal part of Juice to the hydrated yeast mixture and let it stand another 15 minutes. Pour the yeast mixture into the bucket and stir gently.
Place the juice bucket with the lid lightly on or with a cheese cloth over it in an area that is 76° F. Fermentation is greatly affected by temperature. A brewing belt can be attached to the bucket to help control the temperature.
Step 5 - Stir: Twice a day stir gently for 5 minutes (with a sanitized spoon or paddle); preferably once in the morning and once in the evening. Continue to monitor the yeast activity (bubbling, foaming, etc.) that is most active in this stage. Readings of the S.G. decrease as sugar converts to alcohol.
Stage 2 - Secondary Fermentation: Approximately 5-7 days after pitching yeast
Watch our video on the Stage and Stage 3 Here
Step 1 - Test: Test the S.G. it is most ideal to transfer once the S.G. reaches 1.020. If your wine is not at 1.020 wait another 24-48 hours and re-test. NOTE: If you want sweet wine, ferment the wine to 1.005 and skip stirring as indicated in Step 2. When you transfer leave the dead yeast that has settled on the bottom behind.
Step 2 - Stir: Before transferring, stir the wine with a sanitized spoon/paddle to make sure that any yeast that has settled at the bottom of the bucket is transferred to the secondary. If active yeast is left behind, the fermentation will stop.
Step 3 - Transfer: Using a sanitized auto-siphon or racking cane, transfer the wine to sanitized secondary fermenters (a five gallon carboy and any left over into the 1 gallon jug) and fit the stoppers and airlocks in the openings. Although yeast activity will decrease as the fermentation process proceeds, the process will continue on in this phase.
Step 4 - Monitor the S.G.: In roughly 5-7 days check the S.G. if it is:
- 990-0.996 the wine will be dry
- 000 the wine will be medium-sweet
- Greater than 1.000 it will be a sweet wine.
Allow fermentation to continue to your desired dryness. You should taste the wine to find the dryness or sweetness level that is desired. When the wine is where you like it, proceed to Stage 3 - Stabilization. Remember temperature controls the rate of fermentation, cool temperature will extend days required for fermenting your wine or stop the process prematurely leading to problem wine.
Stage 3 - Stabilization Note: Further fermentation will not occur after this step!
Optional - Adding Oak: Stage 3 is when you will add oak should you desire. The amount of Oak Chips you will want to use varies, but usually it will be in the area of ½ cup for every 5-6 gallon batch of wine.
OAK CHIPS MUST BE TREATED before adding them to your wine. There are two common methods that are used to do this. The first is to boil them in water for a few minutes. The second is to soak them for 24 hours in a solution of 1 quart cold water and ¼ teaspoon Sodium Metabisulphite. Keep the mix sealed in a jar during this time. Put the chips into the carboy before completing Step 3 below. They will float on top for the first few days but will eventually sink to the bottom.
Step 1 - Transfer: Do not stir the wine. Using a sanitized auto-siphon or racking cane, carefully transfer the wine from the 5 gallon carboy and the 1 gallon jug to a sanitized plastic bucket leaving dead yeast and sediment behind.
Step 2 - Stabilize: For every 6 gallons of wine:
Into ½ cup cool water dissolve:
- 3 teaspoons of Potassium SORBATE
- ¼ teaspoon Potassium METABISUPHITE
Pour the mixture into the wine and stir vigorously to de-gas the wine.
Step 3 - Transfer back to carboy: Sanitize the carboy, (add your oak chips if you are oaking), and refill with the stabilized wine to the top (it is essential to fill the carboy to the top with no room for air). Make sure the carboy is topped off. Wine exposure to oxygen can oxidize the wine and cause spoilage. Go by the “thumb rule” there should not be any empty space beyond the length of your thumb from the opening of the carboy. Any wine that does not fit in the carboy can be reserved and sealed in a one gallon jug or smaller to be used for topping up future rackings. Keep air space to a minimum in the smaller jug as well.
Replace the stopper and airlock and place in a cool area preferably less than 65° F.
Watch our video on adding more Oak & Clarifying here
Stage 4 - Aging & Bottling: Store the wine in the carboy in a dry, cool place for 35 to 45 days to allow further stabilization. You should notice the wine clearing and sediment collecting on the bottom of the carboy. Repeat the racking process every 35-45 days to achieve maximum clarity, if desired. At this stage, you may also consider clarifying agents (SuperKleer, Gelatin, etc.) if the wine is still cloudy or oak was used. When wine is clear, it is ready for bottling. Make sure bottles and closures are clean and sanitized. Filtering your wine is an option, but highly recommended.

